When troubleshooting PXE problems its useful to have access to a network trace to see what's going on during the PXE process. I've lost count of the times when a network team assured me that the network has been setup exactly right, or that "no changes" has been made, just to find out that wasn't exactly true. Having a network trace has been invaluable in convincing the network folks that's something is wrong, and my favorite way to get a network trace is to use a Windows 10 machine with Hyper-V, and use it's port mirroring feature.
Note: This post was written for our iPXE Anywhere platform, but it is also valid for more or less any PXE solution.
Setup Hyper-V for network capture of a PXE boot
In this scenario I'm assuming you have a Windows 10 machine with Hyper-V installed available at the network location (VLAN) you are troubleshooting. You also need a guest VM running Windows 10, as well as a blank VM you will use for testing PXE boot.
1. In the Hyper-V Manager, create an External type virtual switch, and connect it to your wired adapter.
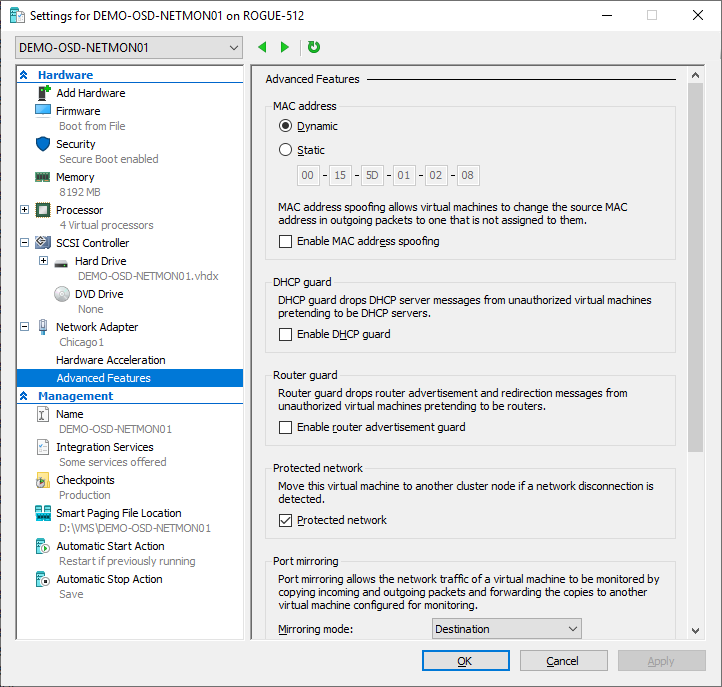
2. Configure the Windows 10 guest VM to use the external switch, and in Settings / Network Adapter / Advanced Features, set Port mirroring to Destination.
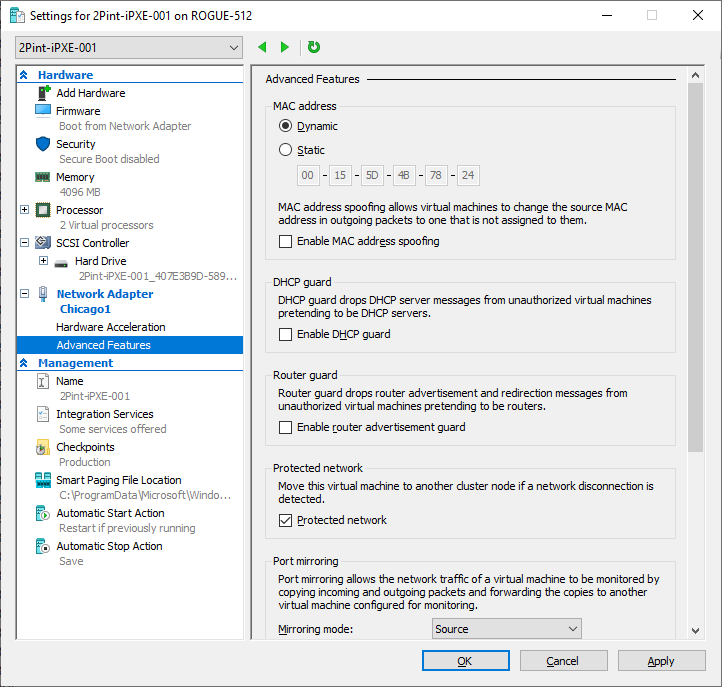
3. Configure the blank Gen 2 VM (UEFI) that you will use to PXE boot to use the same external switch, and in Settings / Network Adapter / Advanced Features, set Port mirroring to Source.
Note: Configure this VM to have at least 2 GB static RAM (disable dynamic memory), disable secure boot (enable after deployment), and assign two vCPU's to the VM.
4. On the Windows 10 VM, install Wireshark, and start a trace
5. Start the blank VM you intended to test the PXE boot with, and review the traffic showing up in Wireshark.
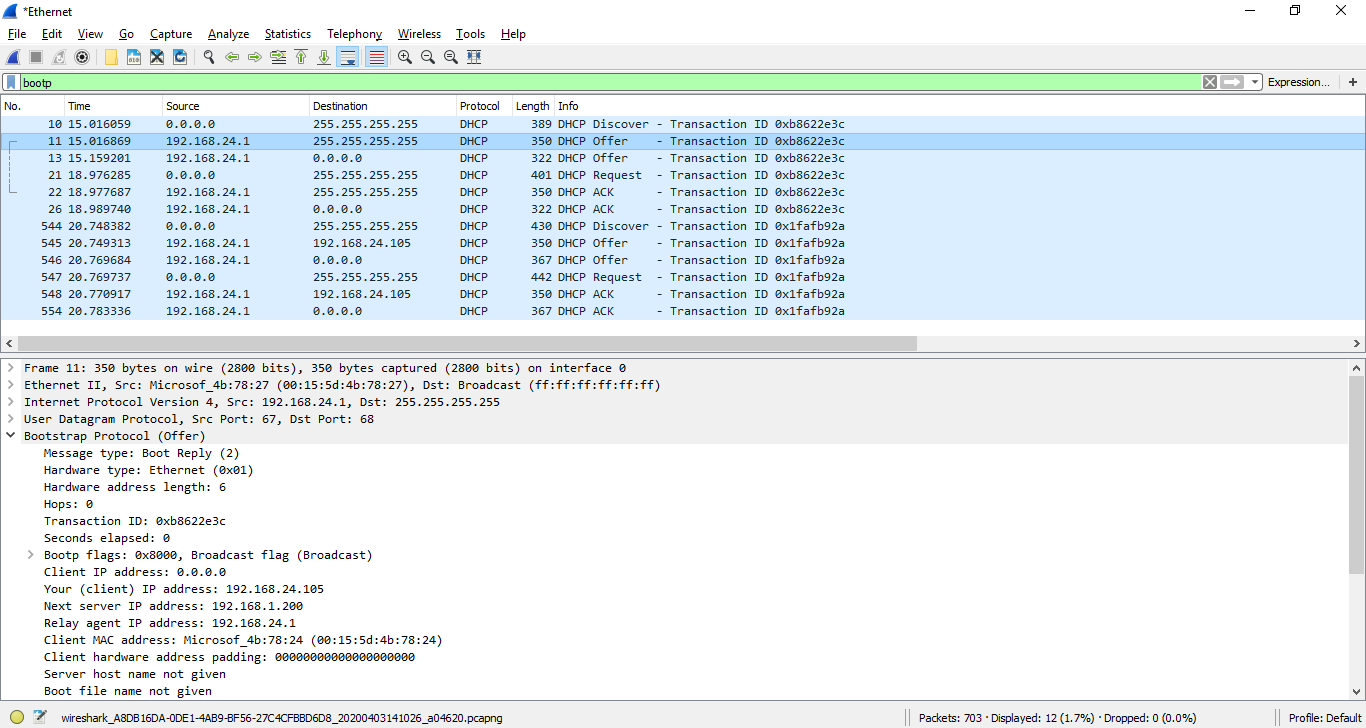
6. As a start, set a filter for bootp and review the result. You should see at least two offers. One from the DHCP Server providing an IP address to the client, and another offer providing info about what PXE server to use, and what netboot file to download. Here is an image showing the first offer with the IP address (192.168.24.105).
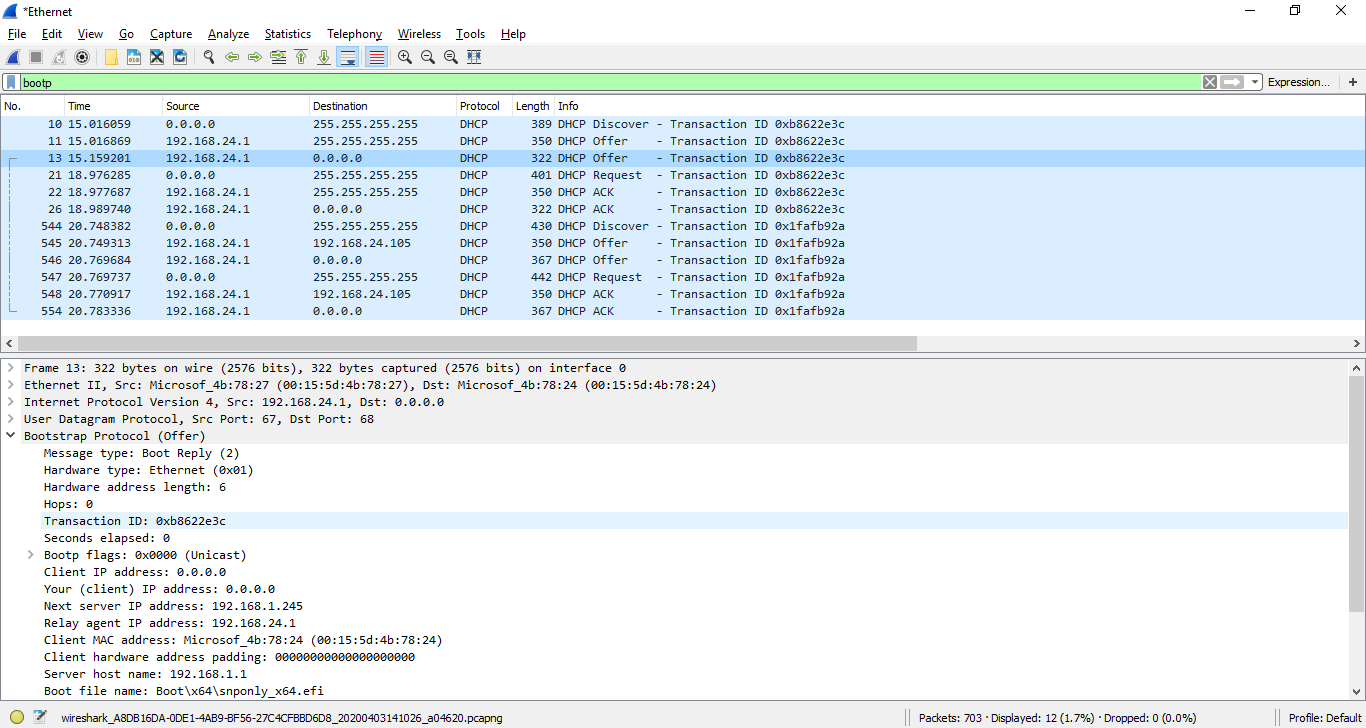
And here is an image showing the second offer, showing the PXE Server IP address (Next server, 192.168.1.254), and the boot file name (Boot\x64\snponly_x64.efi)
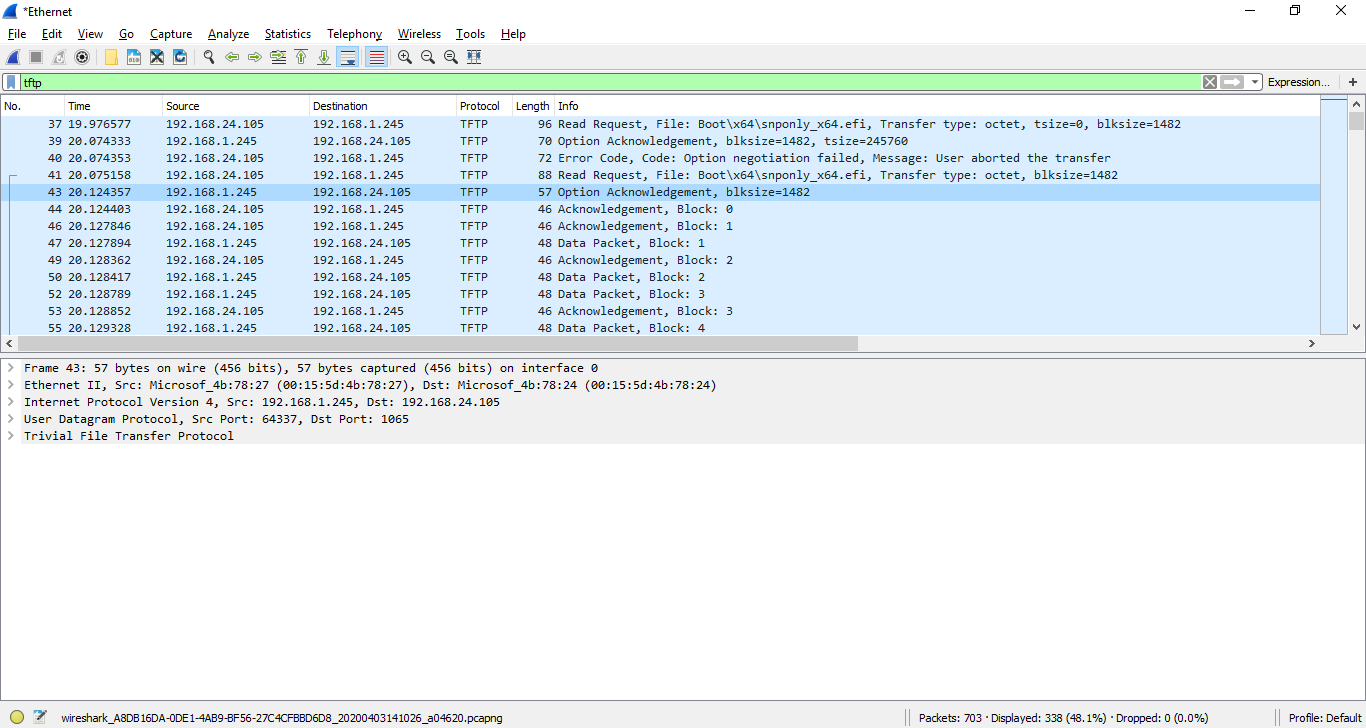
Assuming a boot file is offered, then you can also use the tftp filter, which will show you netboot files being downloaded via tftp, the block size, and the time it takes to download each block. See below image.
Happy deployment / Johan

